How to verify Stylus contracts on Arbiscan
This document is currently in public preview and may change significantly as feedback is captured from readers like you. Click the Request an update button at the top of this document or join the Arbitrum Discord to share your feedback.
This how-to will show you how to verify deployed contracts using Arbiscan, Arbitrum's block explorer.
Here's an example of a verified contract: the English Auction Stylus contract, which has been verified on Arbitrum Sepolia. You can view the verified contract here.
You can also see a list of all Stylus contracts verified on Arbiscan by visiting:
Here are the steps to take to verify a contract on Arbiscan:
Step 1: Navigate to the verification page
You have two options to access the contract verification page on Arbiscan:
- Direct link: Visit Arbiscan Verify Contract to go directly to the verification form. This option is ideal if you already have the contract address and details ready.
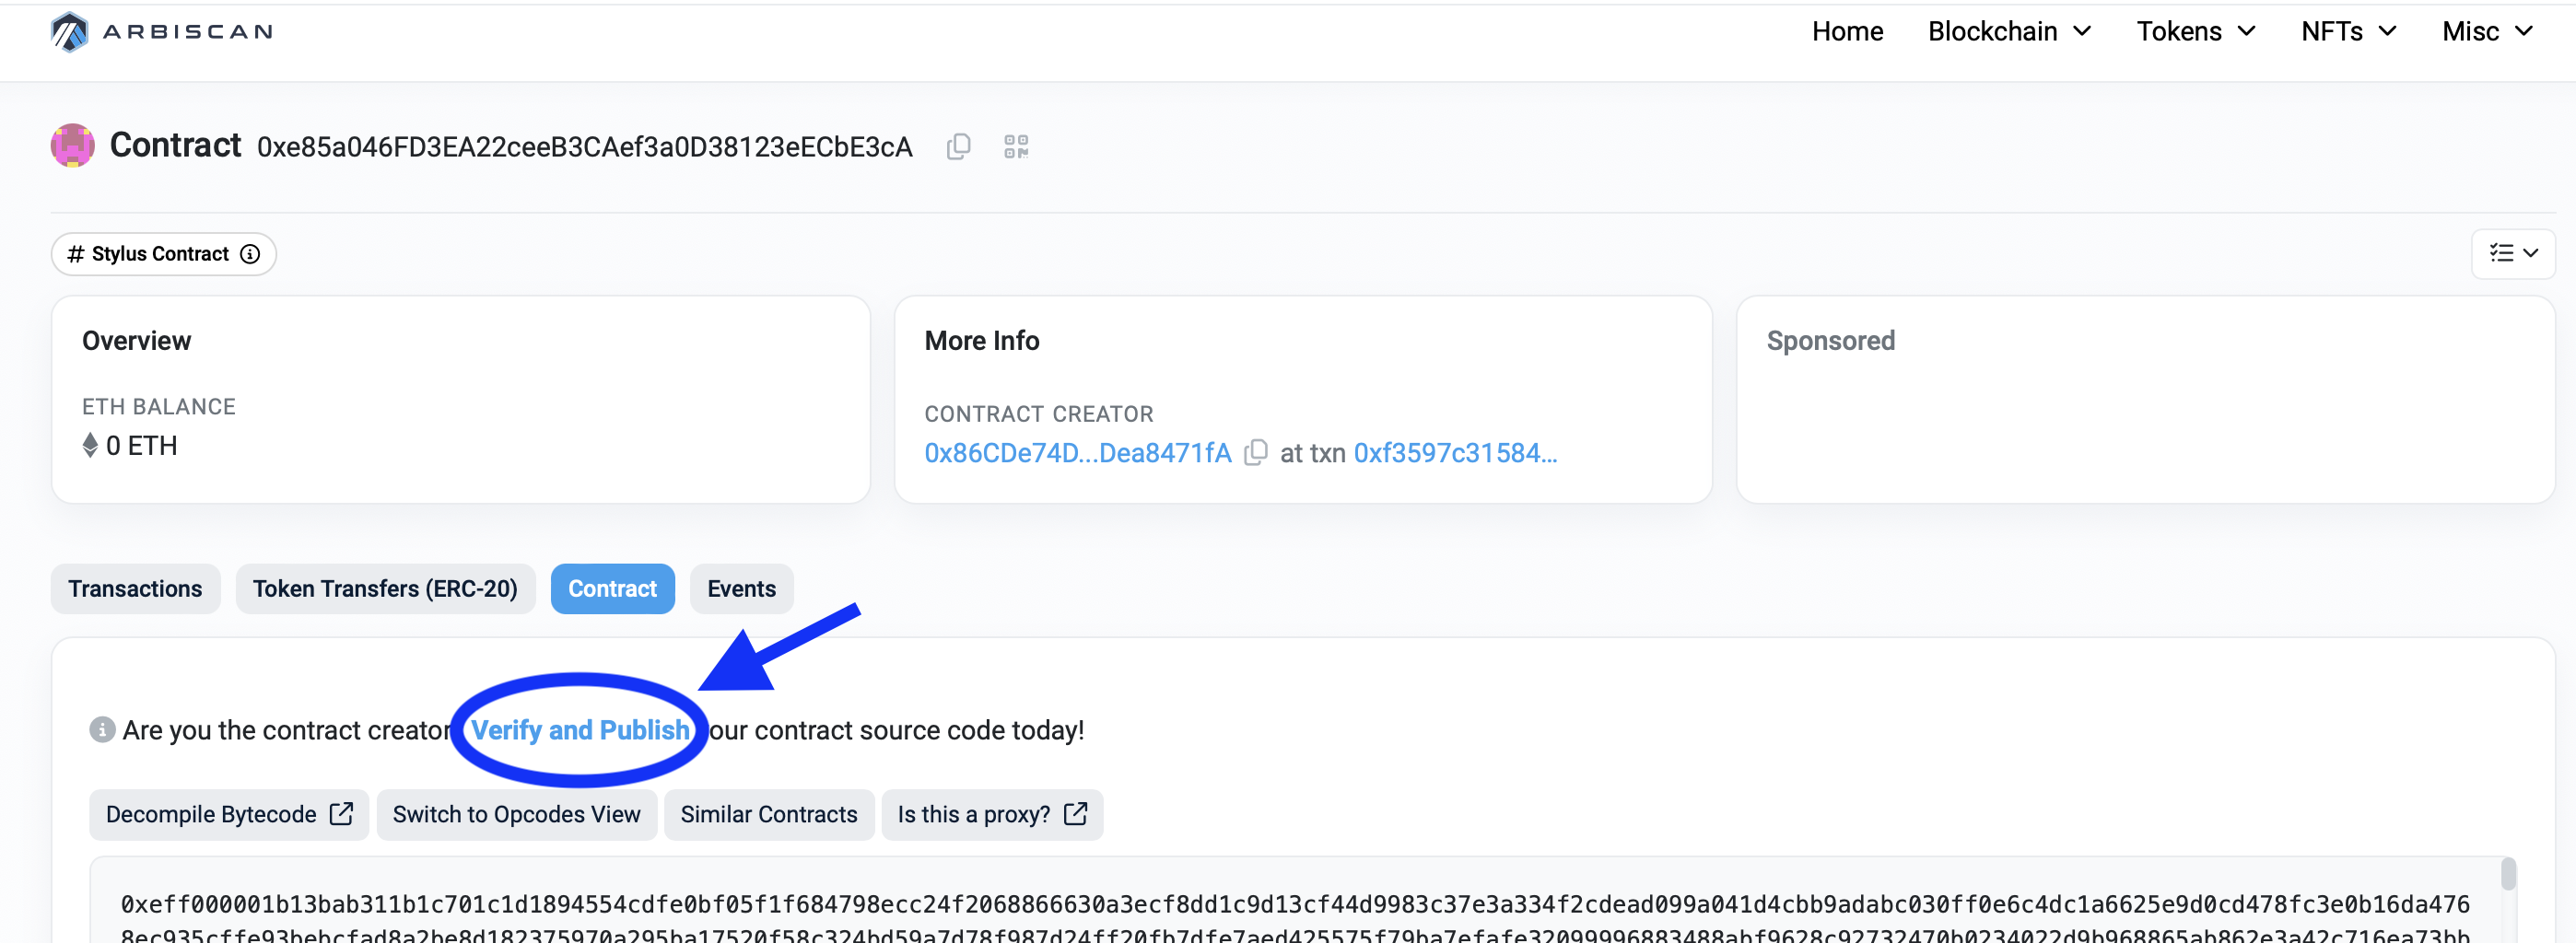
- From the contract page: If you're viewing the contract's page on Arbiscan:
- Go to the Contract tab.
- Click on Verify and Publish.
Both methods will take you to the contract verification form, where you can proceed to the next step.
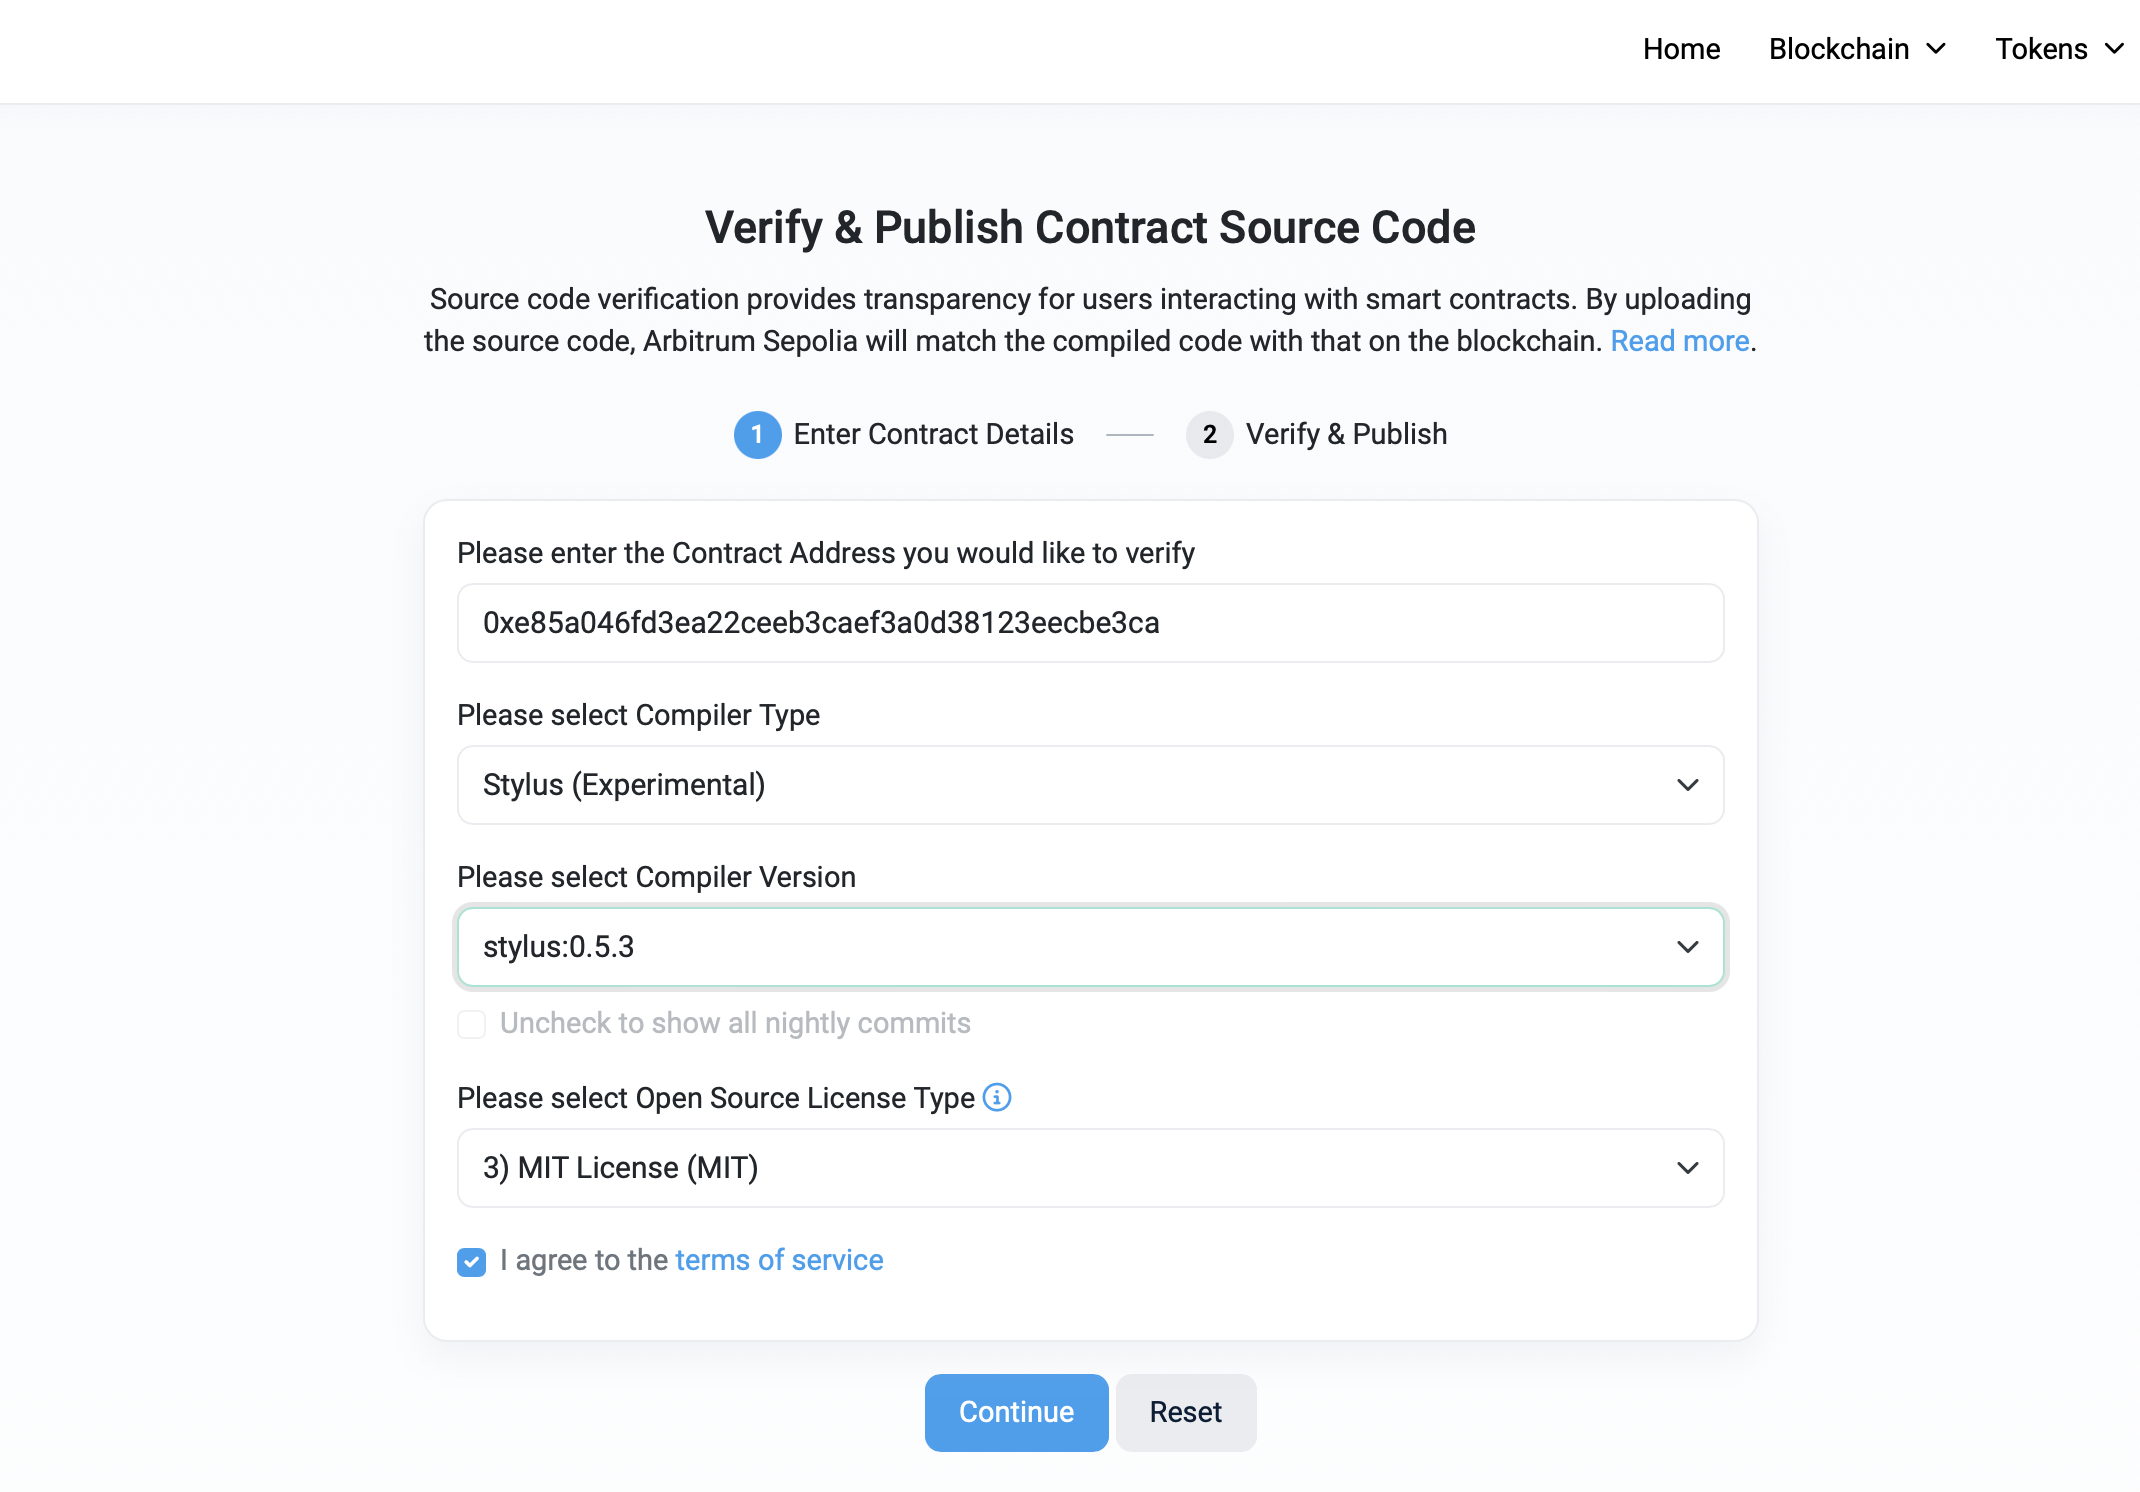
Step 2: Enter the contract's details
You will need to fill in the following fields on the contract verification page:
- Contract address: Enter the contract address you want to verify.
- Compiler type: Select Stylus for Stylus contracts.
- Compiler version: Choose the
cargo stylusversion that was used to deploy the contract. - Open source license type: Select the appropriate license for your contract.
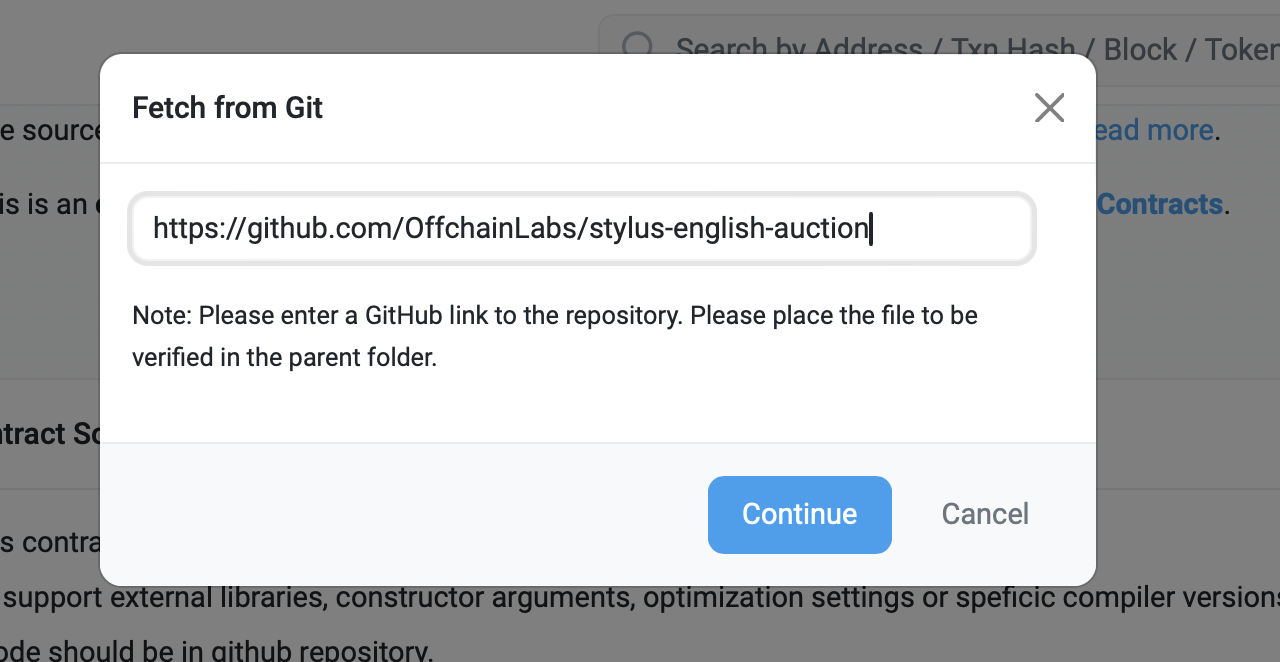
Step 3: Submit source code
After entering the contract details, you’ll need to provide the contract's source code:
- Manual submission: Copy and paste the source code into the provided text box.
- Fetch from GitHub (Recommended): It's recommended to use the Fetch from Git option, as it's easier and helps automate the process. However, note that contracts located in subdirectories of the repository cannot be verified. Ensure that the contract's code is placed directly in the repository's root for verification to succeed.
Step 4: Set EVM version
The EVM Version to Target can be left as default unless specific requirements dictate otherwise.
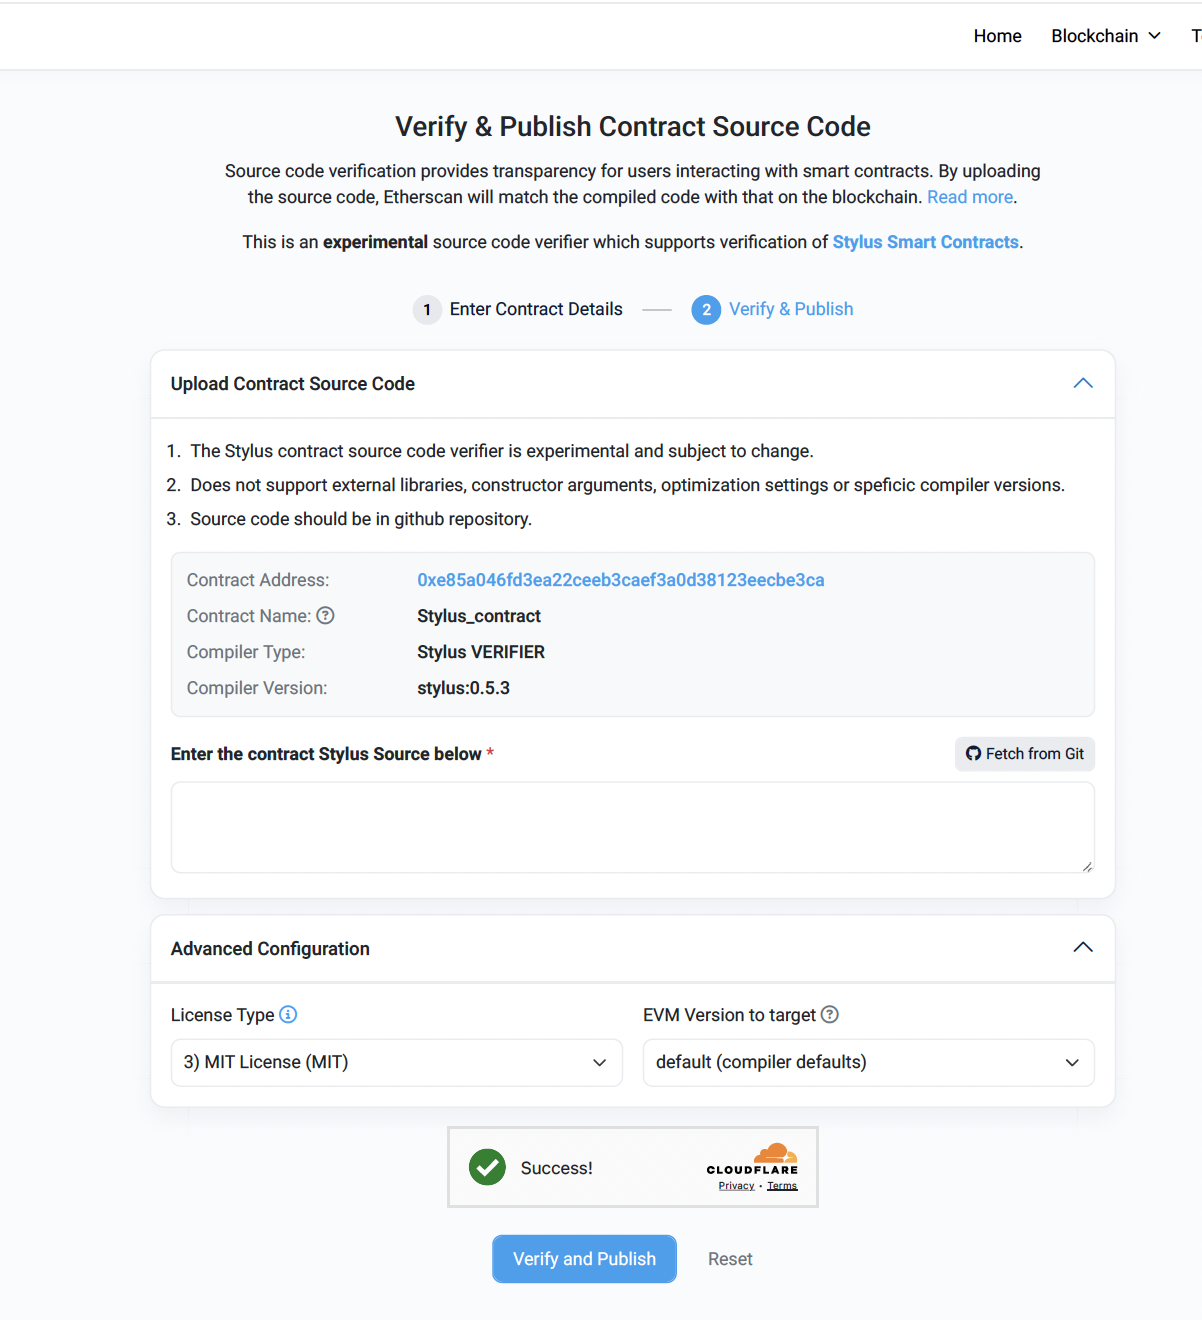
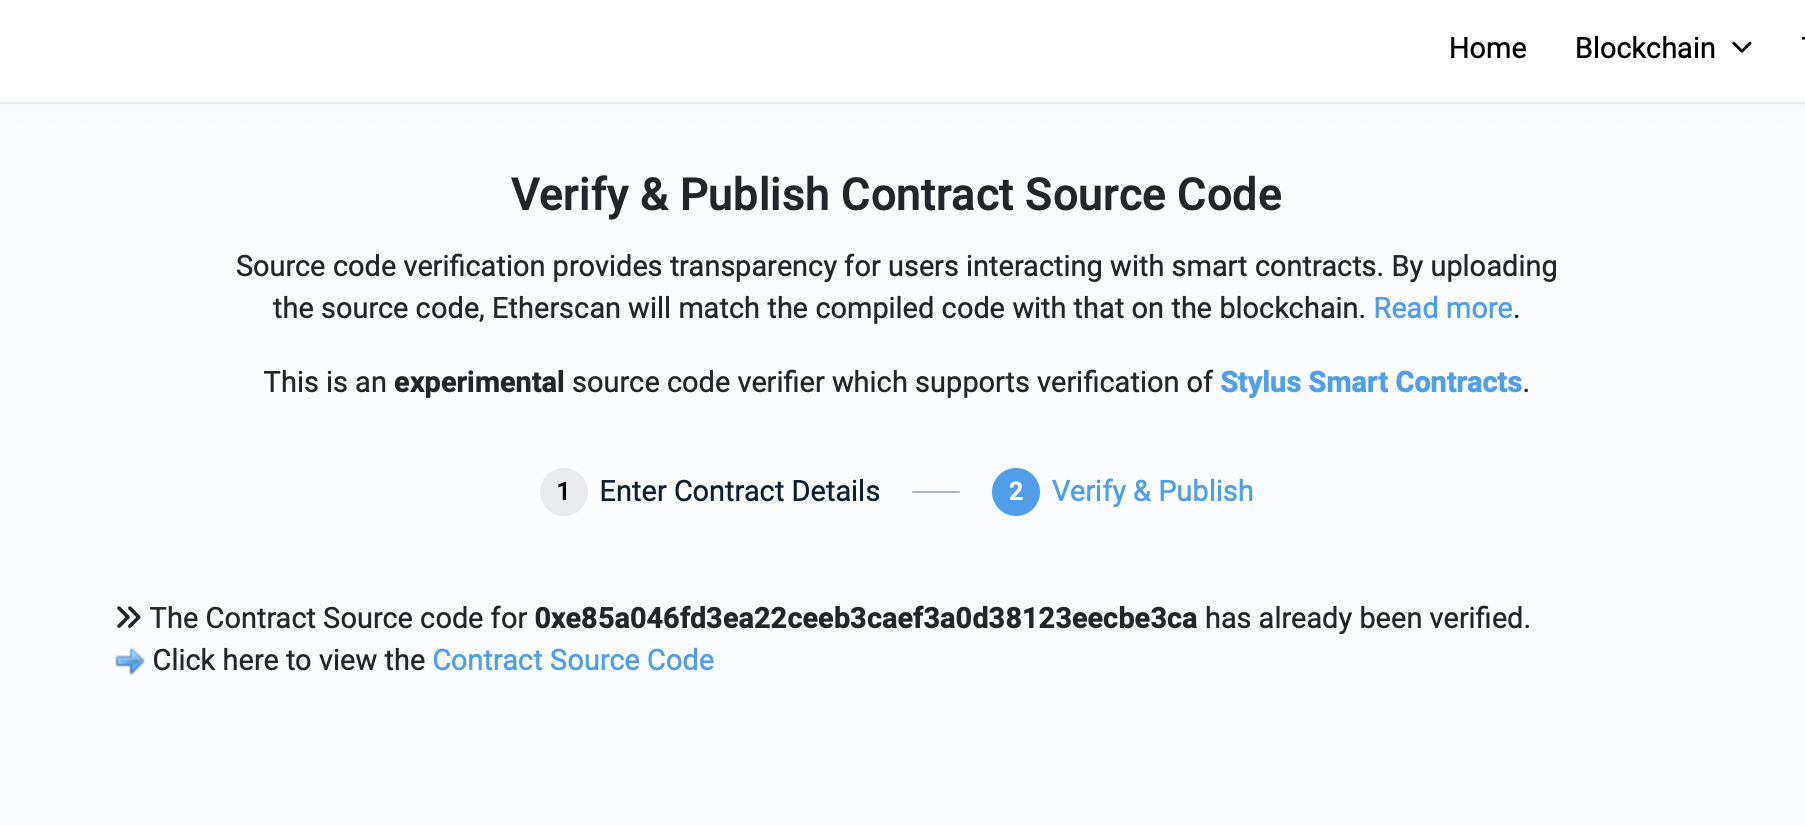
Step 5: Verify and publish
Click Verify and Publish. The verification process will take a few seconds. Refresh the contract page, and if successful, the contract will be marked as verified.
Behavior when deploying a verified contract
When deploying another instance of a previously verified contract, if the bytecode matches, Arbiscan will automatically link the new instance to the verified source code, displaying a message like:
"This contract matches the deployed Bytecode of the Source Code for Contract [verified contract address]."
However, the new contract will still appear as "Not Verified" until you explicitly verify it.